Free help: USER GUIDE
Home > Clients & Profits X User Guide > Production > Job Timeline

|
Clients & Profits X Online User Guide |
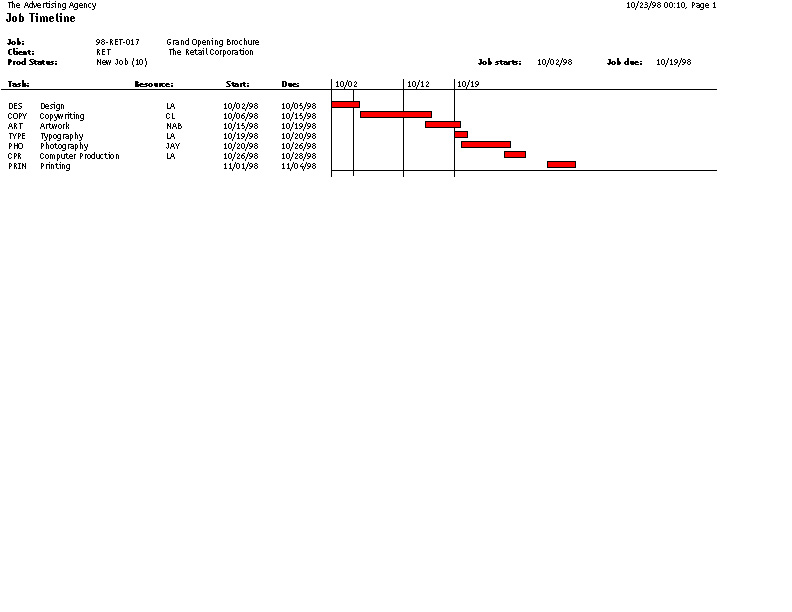
The Job Timeline is a
graphic representation of when the tasks for a job are scheduled to
be worked on.
The timeline
is a job task management tool. With the schedule visually displayed,
you can see if it sets realistic goals. Using the tools and links,
you can add special task instructions, reschedule tasks, reassign
them to other staffers, and more.
The Job Timeline window displays a job’s schedule in
an easy-to-read visual format with each scheduled task
sorted by its start date. Up to six months of a
job’s schedule can appear at one time, but you can
scroll from month to month using the previous and next
toolbar buttons. The entire job’s start and due
dates appear in the upper-right corner of the Job
Timeline window for reference.
To open the Job Timeline window
1 Choose Production > Job Tickets.
2 Find the job whose timeline you wish to
review.
You can either scroll through the jobs using the previous
and next toolbar buttons, or find them using the Find Job
search tool. If you don’t remember the job number,
click on the find more link to search by client,
sequence, production or billing status, and more.
3 Click the timeline link in the lower-left
corner of the Job Ticket window.
The Job Timeline window opens. Once you’ve opened
the Job Timeline, you can get additional task
information, like special instructions or estimate
amounts. You can also reschedule the entire job, reassign
tasks between resources, or clear the entire job
schedule.
To review a task’s special instructions
1 Click on the task to select it.
2 Click the special instructions link.
If the task has special instructions, you’ll be able
to see them.
3 Click the close window box or press tab to close
the Special Instructions window.
To review a task’s estimate amount
1 Click on the task to select it.
2 Click the task estimate link.
The Lookup Estimate window opens. If the task has
estimate information, you’ll be able to see it in
this window.
3 Click the close window box to close the Lookup
Estimate window.
To view the scheduling calendar
1 Click the calendar link.
2 The Calendar window opens.
You’ll see the current month displayed. Small,
non-interactive calendars for the prior and next month
after are also displayed to the right of the current,
interactive month’s calendar. You can make any month
interactive by choosing it from the pop-up menus. Click
on any day in the current month to see which tasks -- and
what resources -- are scheduled for that day.
3 Click the close window box to close the Calendar
window.
To scroll from month to month in the Job Timeline
window
1 To scroll backward one month at a time, click
the previous
Month button.
The timeline moves backward one month each time you click
the button.
2 To scroll forward one month at a time, click the
Next Month
button.
The timeline moves forward one month each time you click
the button.
To clear this job’s schedule
1 Click the clear
button.
2 A dialog box opens asking if you wish to clear
this job’s schedule.
If you click Yes, the job’s schedule will be
cleared. If you click No, the job’s schedule
remains.
To reschedule this job’s
schedule
1 Click the reschedule
button.
2 The Reschedule Tasks window opens.
You can reschedule based upon a new start date or due
date for the entire job.
3 Click on either the Start date or Due date
option to use to reschedule this job.
The current start or due date will automatically appear
in the Current date field.
4 Type the new date.
5 Click OK.
Any unfinished task on this job is rescheduled based upon
the new start or due date of the entire job. The dates
are automatically scheduled based on the lead time added
when the task was set up.
To reassign scheduled tasks to someone else
1 Click the reassign
toolbar button.
2 The Reassign Deadlines window opens.
3 Enter the initials of the staffer who you wish
to remove from whatever task(s) on this job they are
scheduled to do.
4 Press Tab.
5 Enter the initials of the staffer who you wish
to assign to replace the staffer you’ve removed.
6 Click OK.
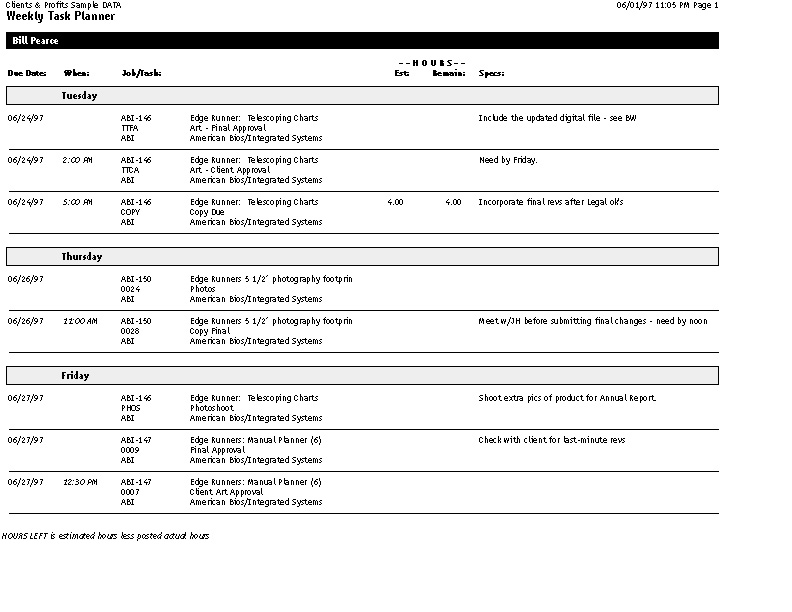
The task or tasks that were assigned to the original staffer are now
assigned to the staffer you’ve indicated should take over the
work. The reassigned tasks will now appear on the new staffer’s
work-to-do
report and Weekly
Task Planner.
To print this job’s schedule
1 Click the print
Schedule toolbar button.
A report listing the job’s schedule will be
printed.
To print this job’s timeline
1 Click the print
Timeline button.
A report displaying the job’s timeline will be
printed. The timeline prints horizontally, so be sure to
check your paper orientation before pressing Print in
your print dialog box.