Free help: USER GUIDE
Home > Clients & Profits X User Guide > Media > Add New Media Estimate

|
Clients & Profits X Online User Guide |
![]()
Anyone who can access media plans
can add media estimates.
A media
estimate is added in two parts, much like adding a job
ticket. First, open the new media estimate, which includes
the estimate number, client, campaign name, and description.
Next, add media buys for each time an ad will run for this
estimate.
Media estimates are flexible, so can be changed as needed. You can change
any part of the media estimate’s client number, description, status,
disclaimer, and approvals (but not the estimate number) any time. Media
buys can be added, changed, and removed as well.
For more information, see the Media
FAQ.
|
|
|
|
|
Learn more about media estimates
in this Clients & Profits classroom video training
session. Running time: 4:02 |
|
|
|
To add a media estimate
1 Choose Media > Media Estimates to open the Media
Estimates window.
2 Click the add button.
The Add New Media Estimate window opens.
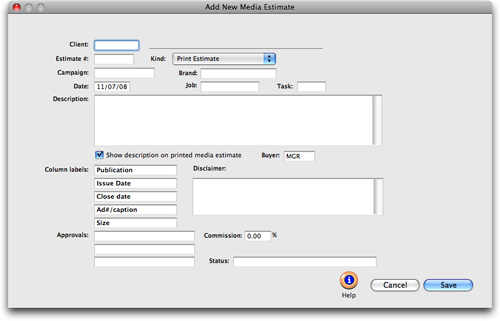
3 Enter a client number.
Each media estimate is opened for only one client. This would be the
client who will be responsible for authorizing these media buys.
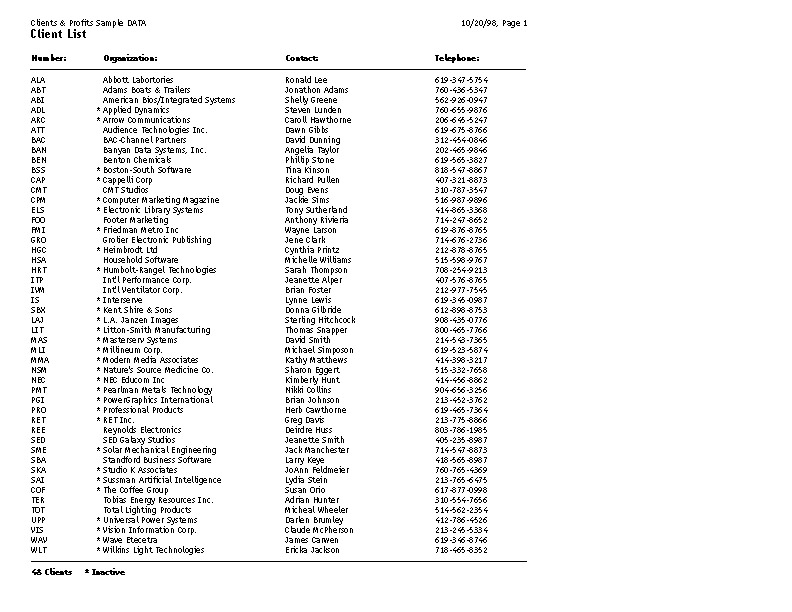
If you don’t know the client number, leave it blank
then press Tab. The client
lookup list opens, displaying your clients. Double-clicking on a
client name enters it into the new media estimate automatically.
4 Enter the estimate number, status, campaign, and
brand.
Media estimates are numbered automatically, based on a client
number. When you tab past the client number, the estimate
number is calculated automatically from the client’s media estimate number. Each client
has a media estimate number -- see the client’s Billing Information
window -- which is customizable. (By the way, media estimates and media
plans are numbered separately.) The standard estimate number combines
the client code and the next media estimate number. You can change it
by entering your own number over the automatic one.
Each media estimate can have a customizable status description.
Status is used to track media estimates from start to finish,
and is optional. There is no lookup table for the media status
-- just enter any text that’s helpful. Later, you can
print a report showing media estimates arranged by status.
The media campaign and brand name are optional, too. They are there as
a convenience to your client, since they appear on the printed media
estimate. Different media estimates can belong to the same campaign or
brand. Custom reports can be created showing media estimates and media
buys by campaign, if needed.
5 Enter the job and task.
The media estimate’s job and task will be copied to the estimate’s
insertion orders.
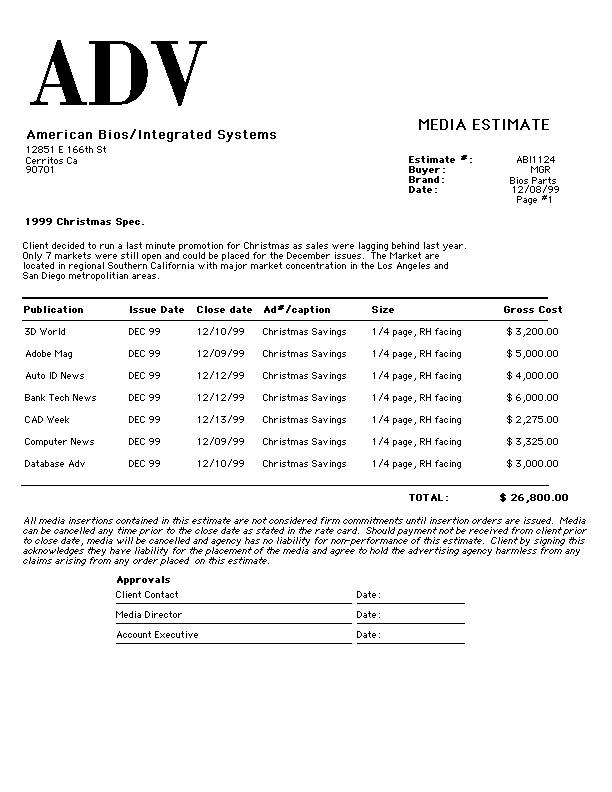
6 Enter the description.
The complete description appears on the printed media estimate.
Use it to describe the estimate’s strategy or objective to the client.
Since the media buys don’t have much room for descriptions, any
additional information or special instructions should be included here.
If you don’t want the description to appear on the media estimate,
deselect the “show description on printed media estimate” checkbox.
7 Enter the column labels.
The media estimate’s column labels determine what kind of information
appears for its media buys. The standard labels are designed for print
media: publication, issue date, close date, ad number/caption, and ad
size. You can enter any kind of text in these labels. When you add media
buys to this estimate, you’ll see these column labels. Each media
estimate can have it's own special set of column headings. The headings
you enter here won’t affect other media estimates.
8 Enter the media estimate’s approval names.
Each media estimate can include up to three approval names. Anyone can
be added as an approval name, such as a client contact, media buyer,
account executive, etc. There are no standard approval names.
9 Enter the disclaimer.
The disclaimer appears at the bottom of the printed media estimate, above
the approval names.
There is no standard disclaimer. (The default disclaimer in Preferences
is only copied to insertion orders, not media plans or media estimates.)
10 Enter the commission percentage.
The commission percentage will be copied from the client file, but can
be changed here.
11 Click Save.
To clone a media estimate
Cloning creates a new media estimate from an existing one. It copies all of the details and buys from an existing media estimate, then lets you change it. To clone a media estimate, choose Edit > Clone Media Estimate. Enter the new media estimate’s additional details, then click Save.
Learn more:
Media Estimates
Editing Media Estimates